Just a reminder to check out this article from September.
NEW STUFF ADDED:
I've added more info including a strobe clamp review from photographer Dirk Dewachter.
Check out the Cool Vivitar flash Mod I've added.
Price sheet for Radiopopper JRX remotes, $99.00 for a set.
Tuesday, November 18, 2008
Saturday, November 8, 2008
good read on SportsShooter.com
http://www.sportsshooter.com/message_display.html?tid=31267#7
Someone posed the question about strobes in gyms and the new D3 and Mark III, wondering if they were important now that you can shoot at higher ISO's without a lot of noise. Glad to see the general consensus agreed with what we here at MaxPreps believe. Basically that there's good and there's good enough. We would like to see good images, not just good enough. So get out those strobes people, basketball is almost here.
Someone posed the question about strobes in gyms and the new D3 and Mark III, wondering if they were important now that you can shoot at higher ISO's without a lot of noise. Glad to see the general consensus agreed with what we here at MaxPreps believe. Basically that there's good and there's good enough. We would like to see good images, not just good enough. So get out those strobes people, basketball is almost here.
Monday, November 3, 2008
Ghost eye fix
Ghost eye is not quite zombie eye but a flat white/red eye with no pupil. Basically the reflection of the flash off the surface of the eye without the reflection going large and over the eyelid. Most folks have been trying to color those in, not a good idea. I will delete any eyes that look colored in. Here's how you can fix most of those slightly ghost/zombie eye shots. You can click on the image to see a larger version, use the back button to get back to the blog.
I can't remember whose photos these are, but everyone has this problem at one time or another. So thanks to the photog who shot these, hope you don't mind.

Ghost eye, too much white with a bit of red.

Here I used the brush tool in Saturation mode at 50% opacity to remove the red color

Then I used the burn tool at 35% midtones to gradually burn back the detail in the eye, trying to keep the eye looking as natural as possible. I've not added anything that wasn't there to begin with I've just removed what the flash created.
Always carry gaffers tape!
This week two different photographers had flash bracket problems. Equipment will break but you have to think outside the box, my philosophy is WWMD, or what would McGyver do? For the broken bracket my fix would be to find one of the team trainers and beg some tape, then stretch the off camera cord as far as it will go down the monopod and tape that sucker down. Make sure you don't tape over the red TTL dohickey (I hope I'm not getting too technical for you) and you're good to go. Flash can be upside down, it won't matter. I've done this and it works great.
So there's my little McGyver fix, what's yours? Send me some DIY photo projects or down and dirty fixes and I'll post them here.
From Micheal Listner: One that comes to mind is when I was shooting during a wet snow storm (works for rain too.) I forgot my camera's rain cover so I improvised using an empty WalMart shopping bag. It looked corny standing out there with it, but it did the job and saved my camera from damage.
From a thread on SportsShooter.com, a cheap flash bracket for night football from photographer Mark Peters: Another vote for mounting the flash beneath on a monopod. Skip the superclamp. Go to a hardware store, buy a simply L corner bracket with the legs about 2 in. They are predrilled with 1/4 in holes. Two hose clamps from the automotive section is all you need to hold it on. Use a 1/4 thumbscrew to attach an off shoe cord and your set. I mount mine upside down for the additional separation. Your cost = less than $5 and it saves the weight of the clamp/ballhead.
Great article by our own Dirk Dewachter.....
Veteran Maxpreps photographer Dirk Dewachter has an article on SportsShooter.com this month about the nightmare of getting your gear stolen and how we can protect ourselves from thieves. I've had my gear stolen, it was a nightmare I never want to relive. Here's the link to Dirk's article: http://www.sportsshooter.com/news_story.html?id=2105
Here's a few things I do to try and protect my gear:
When I am at a venue that I know I will be leaving some gear in the press room or other area, I pack my gear in a big rolling pelican case and bring a cable with a lock. I get some funny looks from the other shooters who just drop their bags on tables or chairs and walk away, but obviously they haven't had their gear stolen, yet. I do the same thing in hotel rooms, everything gets packed in the pelican case and it gets locked to something sturdy, like the toilet. In the car I have metal rings in my cargo area and the case gets locked to those if I have to leave gear in the car, then the case gets covered up with a packing blanket that lives back there just for that purpose. Last but not least I have an insurance policy that covers all my photo gear as well as my personal computer equipment, whether it's in my home or on a job, I'm covered. What they won't replace are the images shot on the job, so when I finish a shoot my cards stay with me, I don't pack them with the gear, just in case.
Monday, October 27, 2008
sRGB
I just found a great article about shooting in sRGB as opposed to AdobeRGB. I added it to my previous article from April but I thought I'd highlight it again.
http://www.shootsmarter.com/index.php?option=com_content&task=view&id=151&acat=16
http://www.shootsmarter.com/index.php?option=com_content&task=view&id=151&acat=16
Sunday, September 28, 2008
Strobing high school gyms

f2.8 @ 1/250th ISO 250
Canon Mark II - 70-200mm f2.8
2 Vivitar 285hv's shoe flashes at 1/2 power
White Balance: AWB
I find Flash White Balance tends to shift the image a bit red.
"Any light is available light" W.Eugene Smith
You can also do the same thing with nikon or canon shoe flashes, but with my set-up you can build battery packs that will recycle quickly and last an entire tournament on one charge for less than $20 bucks a pack. A charge on my homemade battery packs last longer than quantum turbo battery packs. Here's another way to make the fake batteries from a photo blog by photographer JC Sullivan.
And if you really don't want to make them yourselves, Al Jacobs will do it for you:
http://www.aljacobs.com/gear_talk/vivitar_285_hv_-_the_truth_.html
The cords are all the way at the bottom of his rant about the new chinese 285's not being as good as the older original versions. Although I think he may only make them if you buy one of his black boxes.
Monolights are sometimes over kill in smaller gyms and all those extension cords can get messy. This kit sets up quickly and discreetly, many of us use this type of set up. Bigger isn't always better! :)
If you want to use lights like Q flashes or Lumydines make sure you find out what the flash duration is for those lights, it's all about a fast flash duration. Not all flashes are made the same, some have a slow flash duration and it will cause motion blur or ghosting. Do your research.
Speaking of research here's a review of my beloved Vivitar 285hv's from Popular Photography.
RADIO TRANSMITTERS: The standard for radio transmitters are Pocket Wizards, but there are some less expensive alternatives that have come out recently. Paul Buff has the CyberSync: Photographer Christopher Kays has pointed out that to use the Cybersync remotes with a Vivitar flash you'll need a special cord, my flashes came with the right cord (vivitar to monoplug) but if yours didn't you can find them at FlashZebra, they seem to be the least expensive source. Speaking of cords if you need a remote camera cord or any type of special cord or connection, check out Michael Bass he makes all kinds of specialty cords, I have several and they are very well made.
Then there's Radio Poppers, they've been hyping a cheaper version called Radio PopperJR for months now, the P1 poppers have gotten some good reviews so keep an eye out for the Jr's.: http://www.radiopopper.com/ Update on these guys, they've cancelled the Jr's and are making some other radio transmitter, I can't really figure out what they're doing. Okay found a price sheet online, looks like the Jr's are a pretty good deal, $99.00 for a set.
And if you really want to go cheap, there are quite a few cheap units on Ebay and other sites that will work fairly well. Enough to let you get hooked on shooting hoops with strobes. :) Here's an example from AlzoDigital.com and another from Gadgetinfinity.com I've never used either of these, so I'm not making any recommendations, just giving some cheaper alternatives if you're on a really tight budget. Do your own research!
And finally there's buying used, EBay is a good source of used PW's, the neat thing about them is that no matter what model you buy it will work with all the other models. The old 16 channel will work just fine with the brand new Transceivers. I have one of almost every type of PW made except the multi-max.
COOL VIVITAR MOD: Okay, I needed another cord or two since I'm adding two more vivitars to my flash kit. So I checked out FlashZebra ( it was the cheapest at $14.00 a cord), but in my search for something even less expensive, I stumbled on something I think is better. A mod to the flash that hardwires a mono plug directly to the flash so a PW can be plugged right into the flash, brilliant!! Here's a how-to video and here's an article. I'll be modifying my stable of flashes in the next few days and will post a report and photos. I love DIY!
HOW TO SET UP YOUR STROBES:
Here's a great photo of one photographer's set up, basically where he placed his lights in a particular gym and what he wanted as a light spread. Thanks to Thomas Witte, check out his other tips too. http://www.gophotography.net/tips/lighting.html Just an FYI though, he wrote this when he was shooting film, digital requires more stops over ambient to freeze the action than film does. I like to get at least 3-4 stops over to avoid motion blur or ghosting. Drop your ISO to get enough over ambient.
Here's another example www.candideyephotography.com/HSGymStrobes.pdf

Here's a shot of photographer Joe Boyd's set up, he's using Cybersync's, Vivitar 285's and a homemade battery pack. His stand is gaffer taped to the stands, but you could also use zip ties.
Thanks for sharing Joe!
GUIDE NUMBERS: I bet many of you are saying "What the heck is a guide number." It's what we old school fully manual shooters use to use to figure out what power to set our flashes. No TTL in the good old days. :) I can go through a lengthy explanation but luckily David Hobby over at the Strobist has done it for me. But why do you need to know about guide numbers? Because it makes it a lot easier to set your strobes close to the right exposure on the first test shot. The more you understand how this stuff works, the easier it is to get good exposures without a lot of guessing and trial and error.
CHEAP SUPER CLAMPS: Bogen super clamps can be quite pricey, I found these off brand superclamps online for $24.19 I haven't used them myself but if I needed another clamp I'd be giving them a try. For clamping my itty bitty shoe flashes they should work just fine.
Dirk Dewachter sent me an email about a clamp he's now using to attach his strobes in gyms.
Here's what he says:
I started to use these to mount my lights at Volleyball and maybe basketball, if I can move them beyond the baseline: http://www.filmtools.com/matendjawcla.html
They have them in 2 inch or 6 inch thread with a standard light stand knob at the end. I shot the Mira Costa – Orange Lutheran game yesterday and was able to use the two inch threaded ones to pipes to attach them to – see attached images. A lot easier to carry than stands and they are out of the way, as long as you can find something to affix them to. The six inch threaded ones and be mounted to items up to six inches thick such as 2X8’s as you can see in the images, that would have been another option. I use those umbrella swivels with a threaded stud to mount the Quantum flashes to it, plenty of knobs to hang your pocketwizard and battery pack to.
Nobody complained despite two Mira Costa photographers saying ambient light is the way to go because the refs won’t go for it. The heck with them, the best advice I received was from David to mount them on the same side as the referee standing on the ladder by the net.


If you click on the images they will open larger in a new window.
I love when someone starts a thread on Sportsshooter and everyone responds with great links to other websites. Here's an article on the Strobists on using small flashes to help light a college arena. What I like about the Strobist is that he works with what he has to make great images, not "once I get XXXX I'll be able to make good images", it's not the gear folks!!!!
Saturday, September 13, 2008
ISO 6400
Okay all you shooters with D3's and Mark III's just an FYI, 6400 ISO is way too high and if you can't shoot at a decent shutter speed (over 1/500th at least) then what good is it anyway?? Seriously, blurry photos won't cut it here. We use flash to freeze the action, not just to light the field. Also we need to see faces, dark shadows in helmets and no separation between subject and background is another reason to throw a flash on there. Common sense here folks, and they're too noisy anyway. So suck it up guys, put on a flash or get your local high school to put in pro level lighting. Your choice. :) Rant over. Actually one more thing, noise reduction software is not a magic fix for underexposing and high ISO noise. It looks unnatural, creates digital artifacts and is just being way overused. If I can see the noise reduction in the images, then you've used too much. It wasn't meant to fix bad noise, just to clean up some noise in the background. now rant's over. :)
Wednesday, September 10, 2008
20/20/20 rule
This comes from my optometrist, just had my eyes checked and the only problem I have is tired eyes from staring at a computer screen for hours and hours. He told me that I needed to look away from the computer every 20 minutes for at least 20 seconds and look at something 20 feet away. Good advice, so I thought I'd pass it on, our eyes are very important we need to be extremely careful about how we treat them.
External battery pack w/ Canon Speedlights tip....
This one is from Dirk Dewachter. If you're using Canon Speedlghts with a quantum battery pack there's a custom function to make the flash work better with the Quantum pack, probably works with any external battery pack. For the 580ex it's Custom Function 7 -set to 1, on the 580ex II it's custom function 12 also set on 1. This allows the flash to use just the external battery pack for power and bypasses the AA batteries inside the flash, the batteries just power the light inside the flash and the lcd screen. Dirk says it makes the flash recycle faster. If anyone knows if Nikon has a similiar function let me know.
Saturday, August 30, 2008
Lightroom Tips.....
Thanks to everyone who emailed tips, here's one from Matthew Farrell on cropping in Lightroom, thanks Matthew!!
Lightroom lets you specify a custom aspect ratio to use while cropping. Since our images are 1600 x 2166, I made the aspect ratio 21.66 x 16. You can then apply, or “sync”, this aspect ratio to all the images in a folder. This aspect ratio will be maintained while using the cropping tool. When it comes time to output (or “export” in Lightroom lingo), I use the option, “Resize to fit…long edge” with the value 2166. Then, viola, all the images are exported at 1600 x 2166. One caveat though—every once in a while, for reasons unbeknownst to me, the aspect ratio doesn’t carry over properly, and one or two images might come out at 1595 x 2166 or 1604 x 2166 or something like that. To catch those, I just display the folder in Windows Explorer with the files sorted by dimension. It’s really easy then to pick out the oddballs and reapply the correct aspect ratio just to those files. I’d say that happens to about 1-2% of my images. Also, that was in Lightroom 1.3 so the bug may be fixed in version 2.0
Thursday, August 28, 2008
A little help please.....
I'm a photographer, not a computer genius. I came from film and would have happily stayed there. :) I've spent many years learning how to use Photoshop, taking classes and researching on the internet, I really don't want to learn another software program, just the thought of it makes my head hurt, really. But not everyone uses Photoshop and I'm often asked questions about other programs. So I'm reaching out to the network, if anyone is using Aperture, Lightroom or something other than Photoshop to crop for MaxPreps galleries and have any tips or information for your fellow photographers, please send me an email. I'll gather them up and post them on this blog. Thanks!
Monday, July 7, 2008
Pocket Wizard Alternative....
Paul C Buff and his band of alien bees have come out with radio transmitters. The transmitter is only $59.95 and the receiver is $69.95. If these babies work as well as they claim they do, they'll be a great alternative to the more expensive Pocket Wizards. Here's the webpage: http://www.alienbees.com/cybersync.html
If anyone gets a set of these, please let me know.
If anyone gets a set of these, please let me know.
Thursday, June 19, 2008
High School Night Football

Model: Canon EOS-1D Mark II
Lens (mm): 300
ISO: 800
Aperture: 3.5
Shutter: 1/250
Exp. Comp.: 0.0
Flash Comp.:
Program: Manual (of course!)
click on photo to see larger image
no noise reduction software was used in this image.
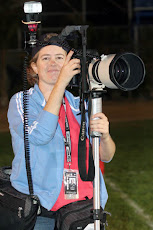
I shot this with a Canon 580ex speedlite set on E-TTL using the bracket shown in my blog photo, in fact my husband took that photo of me at this game. I plan on going to the "down on monopod" bracket for this season.
editors note: If anyone has any comments or thinks I left something out, please send me an email. I welcome any tips you have that others might find useful.
Thanks!
Since most high school games are played at night and most high school fields are badly lit with nasty colored mercury vapor lights that pulse different colors every half second, on camera flash is a required tool to make images that are sharp, well exposed (i.e. no noise) and have good color. We’ve been using flash for night football for several years; we pretty much have down to a science.
Flash: understanding how the flash works helps. Flash is your friend, it’s a powerful tool that is sadly under utilized by most digital photographers. When you shoot in low light you’re forced to shoot with a slower shutter speed to gather sufficient light to create the image. This is fine if the camera is on a tripod and the subject is standing still. But for sports a slow shutter speed will create a blurry image as the subject moves through the frame. Flash will freeze the subject and create a sharp image even with a slow shutter speed. The flash duration (the time the flash throws out light) essentially becomes your shutter speed, anywhere from 1/1000th to 1/20,000th. Use a flash made for your camera (have a Canon, use a Canon speedlite, Nikon? use a Nikon speedlight) and I find that setting the flash in e-ttl or i-ttl mode works the best for me, using manual flash settings is difficult when players are moving all over the field, too hard to adjust on the fly when the play suddenly ends up happening 5 feet in front of you when you had the flash set to work at 10 ft or you’re running down the field to get ahead of the play. Others maintain that manual mode (1/4 power - 1/2 ) gives them a more consistent light. The lower the power on the flash the faster the duration. But it may not get you enough light further away or too much closer in. Best thing to do is experiment and find the best recipe for you. Remember these are just suggestions and guidelines to get you started, you should know your gear and learn techniques that make sense for you. Photography is a craft, an art, nothing is set in stone.
Ambient vs. Flash: Ambient or available light is the existing light surrounding the subject. If you try to use the flash just as fill instead of the main source of light, ghosting or motion blur will occur because the ambient light is affecting the exposure. You need to overcome the ambient light with the flash by at least 2-3 stops. If you’re using e-ttl/i-ttl this shouldn’t be a problem, the flash will automatically send out enough light to overcome ambient and correctly expose the subject without making it look over flashed or light blasted. To fine tune the light you can adjust the FEV (flash exposure compensation) on camera or on the flash or adjust your ISO. Not sure why but most folks agree that FEV works best if adjusted on the camera. If you’re using manual power you need to really watch your histograms. You may have some clipping on the left (shadows) but watch for clipping on the right, highlights. I look for a peak someplace in the midtones with a nice slope into the shadows and highlights. Looking at histograms and deciphering them takes a bit of practice. To test whether you are going to be over ambient with your flash, just set your camera at 800 ISO, f4 @ 1250th and take a photo, it should be very dark, adjust accordingly.
Settings: Every camera has a flash sync speed, most sync at 1/250th; check your camera manual if you’re unsure of your camera’s sync speed. If the shutter speed is set higher than the flash sync speed, you risk seeing the shutter in part of your image, set it too slow and you may get too much available light affecting the exposure and creating blur/ghosting or a color shift
ISO depends on the field, a very dark field with low ambient light might require a higher ISO setting of 800 ISO, a very bright field with good lights might need a lower ISO to prevent motion blur and overcome ambient light, something in the range of ISO 640. Using a very high ISO (over 1000) with flash will be counter productive, you’ll let in too much ambient light, images won’t be sharp, color will be affected by the field lights and you’ll get noise in your images. For some reason we've been seeing many shooters using ISO 3200 and flash, please don't do this, the images tend to be very noisy, blurry and thin. It makes no sense to use a flash and a very high ISO.
Since the background will be fairly dark, depth of field is not as critical, so most of us shoot at around f4, seems to balance the light better at a slightly closed down shutter speed, less chance of blowing the highlights (those shiny white polyester uniforms and white plastic helmets) but you should use the fastest lens you own, a slower lens will be harder to focus in low light. A fast lens (max. aperture of f2.8 or larger) will focus wide open and only close down to your chosen f-stop when the shutter is pushed. Bigger lens opening, more light is gathered and focus is faster. Bigger straw = faster focus Smaller straw = slower focus, AF will be hard to grab in low light, even with a fast lens, it will sometimes hunt for focus, so it helps to focus on a lighter color, white uniforms or the white number on a dark uniform.
Red Eye/Zombie Eye: Red eye can be easily fixed, zombie eye cannot. It’s best to avoid both. The way to do that is to get the flash off the camera and away from the lens. Most of us use a bracket to get the flash up higher or off to the side or both. Some shooters have found that putting the flash down low and attaching it to the monopod works best for them. But basically you just need to get the flash off-axis from the lens. An off camera cord keeps the flash connected to the camera and allows the use of e-ttl/i-ttl.
Here's a great thread on SportsShooter on how some photographers rig their flashes for night football to get the least amount of zombie eye or red eye.
http://www.sportsshooter.com/message_display.html?tid=30821
Fixing Red Eye: Here’s a simple fix for slight red eye.* Use the brush tool in saturation mode to remove the red color. Make the tool the same size as the red part of the eye and set the opacity at around 50%, it’s best to start slow and gradually take out the color. Then use the burn tool in midtones also at around 50% or less and get back some of the detail in the pupil area. Zoom into the eyes when you do this, I’ve actually seen images where the subject had grey raccoon markings where the color had been removed from not only the eye but the face surrounding the eyes, very sloppy. Okay, now let’s talk about ethics and red eye removal, our stand is that the red eye is not there naturally but is created by the photographer, so it’s not unethical to remove it from the image.
*(thanks to Todd and Dirk Dewachter for the tips on red eye removal)
Fixing Ghost Eye/Zombie Eye: Most of the time ghost eye or zombie eye can't be fixed. But if you have just slight zombie eye and there is some detail left in there then it might be saved. Check this out for my method.....http://mpphotoeditor.blogspot.com/2008/11/ghost-eye-fix.html Best thing to do though is to avoid it at all costs, everyone needs eyes or they look totally creepy! Eyes are wet and glisten, so coloring them in makes it look even creepier, seriously bad. Like dead eyes, who wants a photo of someone with dead eyes???? UGH!
Wednesday, May 28, 2008
Championship Jube....

The most important shot from a championship game is the jube or celebration. All the emotion and excitement of winning captured in one image. Be ready towards the end of the game, don't be caught flat footed because you weren't paying attention. Anticipate, get in position and keep your eye in the viewfinder, shoot through the celebration, chimp later. Also don't be the one who runs out and ruins the shot for everyone else, we hate that guy. :) For night games and indoor stuff, don't be lazy, throw a flash on there and get some quality images, put some light on those faces. Flash is also key for the group shot with trophy, even during the day, a little fill flash will really make the image pop and get rid of all that raccoon eye and cap shadows.
Wednesday, May 21, 2008
Always something interesting....

Heston Quan is always thinking outside the box, I know when I open one of his galleries he'll have some really cool shot in there, but I was really blown away by his recent Track and Field gallery.
Nice stuff Heston!
Here's the link to Heston's Gallery:
CIF- SS Championships (Boys Long Jump)
Photo by Heston Quan
Tuesday, May 13, 2008
Back Button Focus
If you're still using the shutter button to focus, then you're probably missing shots. Try using the back button, it takes a bit to get used to using your thumb to focus but once you get the hang of it you'll never go back. By seperating the focus from the shutter you can track moving subjects better, your shutter will release quicker and you can pre-focus and meter without moving focus. Here's an article about it from Canon: http://www.usa.canon.com/dlc/controller?act=GetArticleAct&articleID=2286
But it works for you Nikon shooters too. :)
But it works for you Nikon shooters too. :)
Friday, April 25, 2008
Blown Highlights
Since we've all moved outdoors I've been noticing a problem with blown highlights. White uniforms in bright sun can pose a problem, especially if you're shooting in aperature priority mode and using +ev comp to compensate for the shadows. A very useful exposure tool is the blinking highlights feature. Always have this feature enabled in your lcd. That way if huge chunks of your image are blinking, you'll know that you need to adjust your exposure. When you blow the highlights, or overexpose, there is no information recorded in that area of the image, so trying to fix it in photoshop is not an option. I found a few interesting sites that talk about blinking highlights and metering:
http://www.ximinasphotography.com/lessons/lesson04/lighting_4.html
http://www.naturescapes.net/092004/gd0904.htm
http://www.ximinasphotography.com/lessons/lesson04/lighting_4.html
http://www.naturescapes.net/092004/gd0904.htm
Wednesday, April 23, 2008
From the Internet
There is so much information out there about digital photography, numerous websites and blogs that talk about photography and post processing. One of my favorites is SportsShooter.com, a search on their message board will answer just about any question you have about cameras, techniques, photoshop, etc. Another great resource is The Strobist, if you want to learn to use lights, just read David Hobby's blog. For photoshop there's http://www.photoshopuser.com/ also known as NAPP, National Association of Photoshop Professionals, you have to be a member to access the whole site, I am and have been for several years, but there's also info non-members can access, like PhotoshopTV. Of course there's Fred Miranda's site, http://www.fredmiranda.com and Rob Galbraith's site, http://www.robgalbraith.com, both are good resources for gear reviews.
Another great resource on the internet is being able to see other photographers work, looking at good photography can help you make better photos. See what the pro's are shooting, different angles, etc. Your photos shouldn't be the only sports photography you know, find a couple of photographers you admire and look at their work regularly. Getty images is a good resource, SI's website is another and Photoshelter has a plethora of great photographs to browse through. Most major newspapers have an online site that contains galleries from their photographers, a lot of those photographers are now writing blogs too.
If you know of a good photo website or blog, send me a link.
Thursday, April 10, 2008
Tilted Horizons
Okay folks, I have been seeing way too many skewed, slanted and tilted images. The excuse I commonly hear when I point these out to photographers is "the monopod did it". Okay that happens, here is one way to fix that, keep your tripod collar loose and that way you can keep your camera level when you have to slant the monopod to catch the action. If you still have problems taking a level photo, fix it in photoshop! You can tilt your crop to fix the slant. Keep the tilted images in the wedding galleries and senior portraits please!
Tuesday, April 8, 2008
AdobeRGB vs sRGB
As you all know, or should know, one of the digital image requirements for a gallery on MaxPreps is that all images must be in the sRGB color space. There's a very good reason for this, two actually, the first is that sRGB looks best on the web. AdobeRGB looks washed out and flat when viewed on the internet, colors look wrong.
The second reason is that all online printers (we use EZprints) use the sRGB profile for their printers, so if you want your images to print well then they must be in sRGB. I shoot all my MP stuff with my camera set in the sRGB colorspace, it's just easier than converting later. If I'm shooting commercial stuff or something that will go to graphics then I'll shoot in RAW and convert to whatever color profile the client wishes. But for images that will only go to web and online printing, why bother with RAW? sRGB works just fine and no client that has licensed my photos from MaxPreps has ever asked for anything else. Back in the days of film, sRGB would have been called slide film. :)
Take a look at these articles for a better understanding of the two color profiles:
http://www.kenrockwell.com/tech/adobe-rgb.htm
http://www.cambridgeincolour.com/tutorials/sRGB-AdobeRGB1998.htm
http://www.nulab.com.au/newsletter/november2004/sRGBViaAdobe02.htm
http://www.shootsmarter.com/index.php?option=com_content&task=view&id=151&acat=16
Monday, April 7, 2008
Calibrate your monitor
It's not hard to do, you can calibrate just about any monitor, some laptop's can be difficult though. You can buy a calibration tool that comes bundled with calibration software or at the very least you can use photoshop's Adobe Gamma or freeware on the web to try and get close to calibrated. The most common reason for a gallery to be deleted is that it's too dark, most of the time it's because the photographer is toning their images on a monitor that's way too bright.
I use GretagMcBeth's ( Xrite ) Eye one Match 3 software with the Eye-One Display 2 colorimeter (Xrite link), but there are several units available that work just as well. Here's a review by an online printer of several different calibration tools:
http://www.drycreekphoto.com/Learn/monitor_calibration_tools.htm
And here's a tool recommended by a couple of MaxPreps shooters here in WA, the Pantone Huey
a good inexpensive alternative.
Compared to the cost of most digital photo equipment, calibration tools are pretty inexpensive. If you're going to spend thousands on the latest bodies and the fastest glass, then why process your images on an uncalibrated monitor? You want your work to look it's best, that's not going to happen if you don't control every aspect of the creation of that image. If you don't have a calibrated monitor then you're simply guessing when you process your images.
I calibrate once a week, but for most shooters once a month is sufficient.
Here's another article on the web that talks about monitors and calibration and also compares some of the calibration tools available. Smartshooter.com
Wednesday, April 2, 2008
Sports Photojournalism vs. Youth Sports photography
Photojournalism is a particular form of journalism (the collecting, editing, and presenting of news material for publication or broadcast) that creates images in order to tell a news story.
(From Wikipedia, the free encyclopedia)
Telling a story with photographs, that’s what we want to do with our galleries on MaxPreps. We’d like to get away from the “youth sports photo company” mentality and have galleries that are compelling, that tell the story of that particular game. Shoot the kids cheering in the dugout, umpires calling a play, coaches interacting with players. Shoot through a play, sometimes the reaction after the action is just as compelling as the play itself.
There’s nothing more boring than a gallery of nothing but batting shots and pitchers. Believe me I’ve seen my share; it’s the “I’ve got to get a shot of every kid” syndrome of shooting. Just staying in one spot and shooting every kid as they stand in the batters box like those guys at amusement parks that take tourist’s photos as they come through the gate. Doesn’t sound like much fun to me. Be creative, think outside the box, have fun shooting. Tell a story.
Dial M for better exposures…..
Today’s digital cameras have a lot of bells and whistles, a lot more features than I’m used to in a camera. But with all those micro chips and processing doodads, nothing compares to a photographers eye when it comes to seeing light. In fact the best compliment you can give a photographer is to say they see light well.
A camera is a tool, that’s all, it doesn’t think and photographers shouldn’t rely on those tools to pick their exposures for them. If you want the best image out of your thousands of dollars worth of digital gear you need to learn how to use your in camera light meter. You need to be able to see the light and adjust both the shutter speed and the f-stop manually to get the exposure you want, not the exposure the camera “thinks” you should have. Too many shooters are relying on aperture priority (AV) or shutter priority (TV) mode to make their exposures. In situations where the subject is backlit, relying on the camera to know what you want to accomplish will inevitably result in an image that is flat and badly exposed. I can almost tell without looking at the image’s exif data which gallery was shot in manual mode and who’s shooting in an auto mode, there is that much of a difference in image quality. If you don’t believe me start looking at some really good pro sports shots (or any good photography for that matter), just look at the light, not the action or the emotion, but how that photographer used light to help make the image. If you have often wondered how some photographers get great shots even when the subject is backlit, then the answer is they’re shooting in manual mode. Want to make processing faster and easier? Shoot in manual mode. Get it right in camera and you’ll spend less time in front of your computer.
The main excuse I hear from auto mode shooters is that the light changes too fast for them to adjust. Granted it does take practice, but in time it will become second nature to check the meter and adjust on the fly. Having a good eye and framing the action well is not enough, you need to know your tools and be able to use them to their full capabilities. Stop pointing and shooting and start making images.
A gray card is a common metering tool, but since I never remember to bring my gray card, if I’m shooting outside, I use grass. Green grass has around the same tonal qualities as a photo gray card. I use the grass as a starting point and then tweak the exposure up or down depending on the subject and my own personal experience using my camera. I use the histogram in my camera and not the image on the LCD to judge exposure.
To learn more about your metering system, find that little book that came with your camera, it’s full of all kinds of useful information. I also found a few articles on the web that may be useful; metering is an essential skill for any photographer.
Metering:
http://www.acecam.com/magazine/gray-card.html
http://www.dpreview.com/learn/?/key=metering
http://www.dpreview.com/learn/?/key=exposure
http://www.fredmiranda.com/A16/
http://www.luminous-landscape.com/tutorials/understanding-series/understandexposure.shtml
Histograms:
http://www.luminous-landscape.com/tutorials/understanding-series/understanding-histograms.shtml
Spring Sports
Just some basic Photo 101 here, so if you already know this stuff then just ignore this post.
Backgrounds: high school fields can have some really distracting backgrounds, yellow school busses, some yahoo in a bright shirt hanging on the fence, lots of chainlink, etc. Shallow depth of field is key in creating a compelling image. You want to isolate the players, draw the viewers eye to the action and not the junk cluttering up the backgrounds.
Sometimes a different angle can make the difference between a snapshot and a photograph. Shooting up from a lower position or getting up into the stands and shooting down. Think about your settings and try and visualize the shot.
Sharpness: I've seen shots that would have been really great if they had just been sharp. Usually the culprit isn't focus but a slow shutter speed. As the light fades in the afternoon, keep an eye on your shutter speed and try to keep it up as high as possible, anything under 1/1000 is really pushing it, I like to stay over 1/2000. The ability to change ISO's on the fly is a great advantage with digital cameras, use it. The other culprit that causes an otherwise good photo to go bad is the teleconverter (aka extender), a 1.4tc will sometimes work well, but a 2x almost never does and never, ever, ever use a 2x on a zoom. Experiment all you want with them, but please check out the image quality of the photo and make sure it's up to par. Just because you want to stand further back from the action doesn't mean lowering image quality standards. Color and contrast usually suffer as well as sharpness, great way to make an expensive lens look like a piece of junk hunk of glass. They will also slow down your AF as well as losing a stop of light.
Color: Digital cameras just don't handle color temps as well as film. The color will really start to shift when the light starts to get cooler in the evenings. I understand golden light and a slightly warmer skin tone with afternoon light, but it shouldn't be an overal cast throughout the image. Sometimes it's just a toning issue, the image is dark and that will make the color shift, usually to red. Darker skinned players will look especially red if the image is too dark, by just brightening up the image in either curves or levels, the color will often correct itself. As far as white balance settings, I can only speak as a Canon shooter, AWB works the best for me. The other settings seem to actually cause color shifts.
Composition and Editing: Please don't shoot backs. Unless it's an incredible shot of a kid leaping or diving or doing something really cool, backs are a no no. No backs of batters, backs of kids squatting, backs of runners, etc. Seriously, get some face! And definitely no butt shots! That's particularly important during football season!
Don't shoot so tight that parts of the head or hands will get cropped off in printing. Try and leave a bit of space for that, but not too loose. Try not to shoot players or coaches just standing around looking stupid, get them yelling, gesturing, interacting with others. If you want to include some portraits, that's fine, but try and capture a moment when the person looks good or interesting.
If you're shooting baseball or softball, please don't post shots of players obviously missing the ball at bat.
Do a tight edit, just because it's sharp doesn't make it a great photo, 8fps make for some very similiar images, just pick the best ones.
Be creative, have fun!
Here's a good article on SportsShooter about clean backgrounds: http://www.sportsshooter.com/news/1915
Subscribe to:
Posts (Atom)